Beginner’s Guide to Replacing a Tongue-and-Groove Floor Board Leave a comment


Easy Steps to Refresh Your Flooring
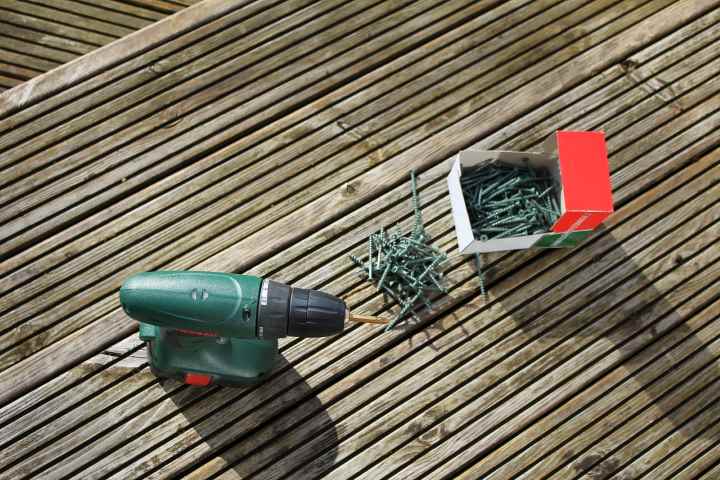
Tongue-and-groove flooring, with its interlocking design, offers a seamless and sturdy surface for your home. However, accidents happen, and you may find yourself needing to replace a damaged board. Fear not! This guide will walk you through the process, ensuring you can tackle the task with confidence.
Understanding the Task
The unique interlocking feature of tongue-and-groove boards means that removing and replacing a damaged board requires precision. You’ll need to cut through the board without harming the subfloor or any hidden installations.
Tools and Materials You’ll Need:
- Circular saw with a metal cutting blade
- Pry bar
- Chisel
- Replacement tongue-and-groove board
- Lost-head nails
- Hammer and nail set
- Wood filler and sandpaper

Step-by-Step Replacement Process:
Prepare Your Tools: Ensure your circular saw is equipped with a suitable blade and set to the exact depth of the damaged board to avoid cutting into anything beneath the flooring.
Cutting Out the Damaged Board: Use the circular saw to cut along the length of the damaged board on both sides. This method helps in releasing the board from its interlocked position.
Removing the Board: With a pry bar (rest it on a wood offcut to protect adjacent boards), carefully pry out the damaged piece. Use the bar to remove any nails that are holding the board in place.
Preparing the Replacement Board: Before installing the new board, you’ll need to remove the tongue part of the board that will be facing down. This can be done with a sharp chisel or a saw, depending on the thickness of the board.
Installing the New Board: Fit the new board into place. Secure it by nailing through the top, ensuring the nails are driven in at an angle to catch the subfloor. Use a nail set to countersink the nails, avoiding any protrusion above the board surface.
Finishing Touches: Fill the nail holes with wood filler, let it dry, and then sand the area until smooth. This will make your repair work virtually invisible.
Cutting Across the Grain (Alternative Method):
For smaller damaged areas, consider cutting across the grain along a joist. This allows for the removal of a smaller section but requires filling the cuts on adjacent boards with wood filler for a seamless finish.
Tool Recommendations:
- Circular Saw: Opt for a reliable brand like DeWalt or Makita for precision and durability.
- Wood Filler: Choose a high-quality filler like Minwax or Elmer’s that matches your floor’s color.

- Sandpaper: Get a variety pack to ensure you have the right grit for a smooth finish.

Conclusion
Replacing a tongue-and-groove board might seem complex, but with the right tools and a bit of patience, you can achieve professional-looking results. This guide aims to empower DIY enthusiasts to tackle floor repairs confidently, ensuring your flooring remains beautiful and durable for years to come.


-
FALL Sale & Deals, GARDEN EQUIPMENT, Garden wear
6 Pairs Garden Gloves for Women, Nitrile Coated Working Gloves, for Gardening, Restoration Work, Pink & Green, M
-8% FALL Sale & Deals, GARDEN EQUIPMENT, Garden wear
6 Pairs Garden Gloves for Women, Nitrile Coated Working Gloves, for Gardening, Restoration Work, Pink & Green, M
Designed for Women: This HAUSHOF 6 pairs garden gloves are made exclusively for women or smaller hands. Wearing these working gloves to look after your hands, which making handling tiny seeds, delicate seedling and other light tasks much more easy. The simple design will make palms open and close easily, effortless to reach tools and planting.
Nitrile Coated: The nitrile coating on the palm staves off the bite and sting of insects commonly found in and around vegetation.
Wrist Closure for Protect: Elastic closures keep more of a snug fit of the glove. The wrist closure of HAUSHOF garden gloves prevent loose materials from falling into glove opening when you are digging or weeding. Knitted base that has an extended fitted cuff for added protection, and also keeps moisture from both plants and soil from soaking into the material.SKU: n/a -
Composting, FALL Sale & Deals, GARDEN ACCESSORIES
Garnen 72 Gallon Garden Waste Bags (2 Pack), Heavy Duty Reusable/Collapsible Leaf Basket Bags with 4 Reinforced Handles for Lawn Yard Pool Plant Trash Trimming Gardening Containers
-14% Composting, FALL Sale & Deals, GARDEN ACCESSORIES
Garnen 72 Gallon Garden Waste Bags (2 Pack), Heavy Duty Reusable/Collapsible Leaf Basket Bags with 4 Reinforced Handles for Lawn Yard Pool Plant Trash Trimming Gardening Containers
[72 GALLON WASTE BAGS] Garnen’s yard waste bags are one of the best gardening tools for anyone with a green thumb. Their 72 gallon capacity is large and suitable for both compact and bulky yard waste, like branches, vines, weeds, grass-clippings, etc. They hold more waste than other bags, so you don’t need to take as many trips to empty them.
[ERGONOMIC DESIGN] The outdoor collapsible bags keep ergonomics and convenience in mind. The bags are able to stay upright and open without additional support. Two handles at the top and two at the bottom make the bags easy to carry and empty.
[DURABLE BAGS WITH REINFORCED HANDLES] The polypropylene woven trash bags are lightweight, durable, water-repellent, tear-resistant, and eco-friendly. The nylon handles are reinforced with double stitched webbing, making them extra sturdy.SKU: n/a -
Composting, FALL Sale & Deals, GARDEN ACCESSORIES
3Pack 72Gallons Collapsible Garden Waste Bags, Self-Standing and Reusable Leaf Bag
 Composting, FALL Sale & Deals, GARDEN ACCESSORIES
3Pack 72Gallons Collapsible Garden Waste Bags, Self-Standing and Reusable Leaf Bag
High capacity: The capacity of each garden bag is 72 gallons (H: 76, D: 67), you will have enough space to collect leaves, green cuttings, lawn, hedge cutting, small branches, shrubs, bushes and other wastes. They are very practical containers for garden waste.
Thick and durable: The bag is made of polypropylene fabric, it’s tear-resistant and heat-resistant, not easy to deform, very thick and waterproof.
Easy to use: Each bag has 4 grab handles (2 at the top, 2 at the bottom) and a plastic strips (the bag mouth has a special holes for inserting plastic tape to fix the bag mouth) make the transportation and emptying easier.SKU: n/a -
FALL Sale & Deals, GARDENING TOOLS, Rakes
Garden Rake -Small Leaves Rakes for Gardening – 11 Metal Tines 8.5″ Wide – 78″ Long Handle Leaf Rakes for Lawns Heavy Duty for Yard Lawn Shrub Garden Beds
-7% FALL Sale & Deals, GARDENING TOOLS, Rakes
Garden Rake -Small Leaves Rakes for Gardening – 11 Metal Tines 8.5″ Wide – 78″ Long Handle Leaf Rakes for Lawns Heavy Duty for Yard Lawn Shrub Garden Beds
Premium stainless steel thickened pipe made, this leaf rakes is solid & durable for lifetime use
36-78” adjustable long handle for better accommodate your height and reach.
With 8.5” wide head,this garden rake is great for getting leaves between garden flower bed & shrubsSKU: n/a -
Feeds & fertilizers, FOR PLANTS
Mono Potassium Phosphate for Plants 0-52-34, Soluble Fertilizer for Gardening and Hydroponic Use (2 LB)
-6% Feeds & fertilizers, FOR PLANTS
Mono Potassium Phosphate for Plants 0-52-34, Soluble Fertilizer for Gardening and Hydroponic Use (2 LB)
Monopotassium Phosphate fertilizer contains 52% Phosphorous and 34% Potassium and is water soluble.
Soluble Fertilizer for Fertigation and Foliar Spray
For Use in Gardens, Hydroponic, and GreenhouseSKU: n/a -
Blowers and vacuums, GARDEN EQUIPMENT
Greenworks 24V Cordless Jet Blower, 2.0 AH Battery Included
Finish your project with up to 11 minutes of runtime on high with a 2Ah battery
Powerful axial design provides 330 CFM at 100 MPH
Reduce fatigue with comfort over mold grip and variable speed trigger. Weighs onlySKU: n/a -
Blowers and vacuums, GARDEN EQUIPMENT
EGO Power+ LB6150 615 CFM Variable-Speed 56-Volt Lithium-ion Cordless Leaf Blower – Battery and Charger Not Included…
 Blowers and vacuums, GARDEN EQUIPMENT
EGO Power+ LB6150 615 CFM Variable-Speed 56-Volt Lithium-ion Cordless Leaf Blower – Battery and Charger Not Included…
Turbo button delivers 615 CFM, up to 170 MPH with tapered nozzle attached
Up to 75 minutes of average runtime on a single charge with the recommended 56V 2.5Ah ARC Lithium battery (available separately)
Variable speed dial from 200 CFM to 480 CFM with lock on button for ultimate controlSKU: n/a -
FALL Sale & Deals, GARDENING TOOLS, Rakes
Jardineer 73 inch Garden Rake Leaf, Adjustable Lawn Rake for Leaves, Yard Rakes for Lawns with Expandable Head. Ideal…
-7%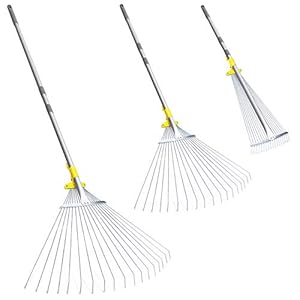 FALL Sale & Deals, GARDENING TOOLS, Rakes
Jardineer 73 inch Garden Rake Leaf, Adjustable Lawn Rake for Leaves, Yard Rakes for Lawns with Expandable Head. Ideal…
73” LESS BENDING & 30” BIGGER EFFICIENT HEAD: 73” longer leaf rake allows less bending down and less fatigue during long time work. The 30” larger rake head is designed to collect more debris with each pass efficiently. Adjust leaf rake head at any width easily in seconds by turning the yellow lock anytime.
THICKER TINES FOR STABLER & STRONGER :18 steel tines are made thicker to bear more debris strongly and stably, collect leaves more efficiently.1” Aluminum handle material is in nature unbendable compared to normal steel rake handle. Top-class Metal construction is made to last for years
LIGHTWEIGHT & MULTI-USE: This ideal rake easily rakes up clippings, leaves and loose lawn and garden debris without damaging plants. Adjust leaf rake width to 10″ for tight areas like under hedges or between flower beds without concern. Note that the leaf rake is NOT designed for heavy duty use such as rock or heavy materials.SKU: n/a


-
FALL Sale & Deals, GARDEN EQUIPMENT, Garden wear
6 Pairs Garden Gloves for Women, Nitrile Coated Working Gloves, for Gardening, Restoration Work, Pink & Green, M
-8%FALL Sale & Deals, GARDEN EQUIPMENT, Garden wear6 Pairs Garden Gloves for Women, Nitrile Coated Working Gloves, for Gardening, Restoration Work, Pink & Green, M
Designed for Women: This HAUSHOF 6 pairs garden gloves are made exclusively for women or smaller hands. Wearing these working gloves to look after your hands, which making handling tiny seeds, delicate seedling and other light tasks much more easy. The simple design will make palms open and close easily, effortless to reach tools and planting.
Nitrile Coated: The nitrile coating on the palm staves off the bite and sting of insects commonly found in and around vegetation.
Wrist Closure for Protect: Elastic closures keep more of a snug fit of the glove. The wrist closure of HAUSHOF garden gloves prevent loose materials from falling into glove opening when you are digging or weeding. Knitted base that has an extended fitted cuff for added protection, and also keeps moisture from both plants and soil from soaking into the material.SKU: n/a -
Composting, FALL Sale & Deals, GARDEN ACCESSORIES
Garnen 72 Gallon Garden Waste Bags (2 Pack), Heavy Duty Reusable/Collapsible Leaf Basket Bags with 4 Reinforced Handles for Lawn Yard Pool Plant Trash Trimming Gardening Containers
-14%Composting, FALL Sale & Deals, GARDEN ACCESSORIESGarnen 72 Gallon Garden Waste Bags (2 Pack), Heavy Duty Reusable/Collapsible Leaf Basket Bags with 4 Reinforced Handles for Lawn Yard Pool Plant Trash Trimming Gardening Containers
[72 GALLON WASTE BAGS] Garnen’s yard waste bags are one of the best gardening tools for anyone with a green thumb. Their 72 gallon capacity is large and suitable for both compact and bulky yard waste, like branches, vines, weeds, grass-clippings, etc. They hold more waste than other bags, so you don’t need to take as many trips to empty them.
[ERGONOMIC DESIGN] The outdoor collapsible bags keep ergonomics and convenience in mind. The bags are able to stay upright and open without additional support. Two handles at the top and two at the bottom make the bags easy to carry and empty.
[DURABLE BAGS WITH REINFORCED HANDLES] The polypropylene woven trash bags are lightweight, durable, water-repellent, tear-resistant, and eco-friendly. The nylon handles are reinforced with double stitched webbing, making them extra sturdy.SKU: n/a -
FALL Sale & Deals, GARDENING TOOLS, Rakes
Garden Rake -Small Leaves Rakes for Gardening – 11 Metal Tines 8.5″ Wide – 78″ Long Handle Leaf Rakes for Lawns Heavy Duty for Yard Lawn Shrub Garden Beds
-7%FALL Sale & Deals, GARDENING TOOLS, RakesGarden Rake -Small Leaves Rakes for Gardening – 11 Metal Tines 8.5″ Wide – 78″ Long Handle Leaf Rakes for Lawns Heavy Duty for Yard Lawn Shrub Garden Beds
Premium stainless steel thickened pipe made, this leaf rakes is solid & durable for lifetime use
36-78” adjustable long handle for better accommodate your height and reach.
With 8.5” wide head,this garden rake is great for getting leaves between garden flower bed & shrubsSKU: n/a -
Feeds & fertilizers, FOR PLANTS
Mono Potassium Phosphate for Plants 0-52-34, Soluble Fertilizer for Gardening and Hydroponic Use (2 LB)
-6%Feeds & fertilizers, FOR PLANTSMono Potassium Phosphate for Plants 0-52-34, Soluble Fertilizer for Gardening and Hydroponic Use (2 LB)
Monopotassium Phosphate fertilizer contains 52% Phosphorous and 34% Potassium and is water soluble.
Soluble Fertilizer for Fertigation and Foliar Spray
For Use in Gardens, Hydroponic, and GreenhouseSKU: n/a -
FALL Sale & Deals, GARDENING TOOLS, Rakes
Jardineer 73 inch Garden Rake Leaf, Adjustable Lawn Rake for Leaves, Yard Rakes for Lawns with Expandable Head. Ideal…
-7%FALL Sale & Deals, GARDENING TOOLS, RakesJardineer 73 inch Garden Rake Leaf, Adjustable Lawn Rake for Leaves, Yard Rakes for Lawns with Expandable Head. Ideal…
73” LESS BENDING & 30” BIGGER EFFICIENT HEAD: 73” longer leaf rake allows less bending down and less fatigue during long time work. The 30” larger rake head is designed to collect more debris with each pass efficiently. Adjust leaf rake head at any width easily in seconds by turning the yellow lock anytime.
THICKER TINES FOR STABLER & STRONGER :18 steel tines are made thicker to bear more debris strongly and stably, collect leaves more efficiently.1” Aluminum handle material is in nature unbendable compared to normal steel rake handle. Top-class Metal construction is made to last for years
LIGHTWEIGHT & MULTI-USE: This ideal rake easily rakes up clippings, leaves and loose lawn and garden debris without damaging plants. Adjust leaf rake width to 10″ for tight areas like under hedges or between flower beds without concern. Note that the leaf rake is NOT designed for heavy duty use such as rock or heavy materials.SKU: n/a -
Cultivators & Tillers, GARDENING TOOLS
15″ Gardeners | Military Grade Steel 6 Tines and Prime Wood Japanese Ninja or Cultivator for Perfect Pulverized and Aerated Soil, Ergonomic Wooden Handle for Firm Grip
 Cultivators & Tillers, GARDENING TOOLS
15″ Gardeners | Military Grade Steel 6 Tines and Prime Wood Japanese Ninja or Cultivator for Perfect Pulverized and Aerated Soil, Ergonomic Wooden Handle for Firm Grip
SUPERB 5 TINES – With its 5 tines, this ninja cultivator will perfectly break and loosen the soil into smaller pieces to allow air and water to petrate deeply into the soil and drain more efectively.
MILITARY GRADE STEEL AND WOOD MATERIALS — The mateials are super strong, lightweight, wetherproof, rust resistant, and require less maintenance. This garden definitely will stay with you for a lifetime.
ERGONOMIC WODEN HANDLE FOR EASY HANDLING — The ergomic long wood handle comes with double rivet so it won’t slip off from the rake, allow you to dig deeper and provide you with a firm grip to reduce hand and wrist fatigue.SKU: n/a -
GARDEN LIGHTING, Lamps & Lighting accessories
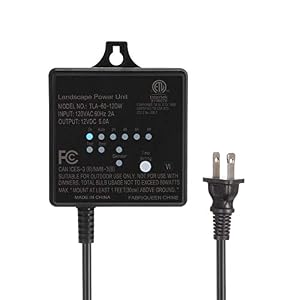
DEWENWILS 60W Outdoor Low Voltage Transformer with Timer and Photocell Light Sensor, 120V AC to 12V DC, Weatherproof…
 GARDEN LIGHTING, Lamps & Lighting accessories
DEWENWILS 60W Outdoor Low Voltage Transformer with Timer and Photocell Light Sensor, 120V AC to 12V DC, Weatherproof…
【Built-in Dusk to Dawn Sensor】: Attached with this transformer, the landscape lighting will turn on automatically at dusk and off at dawn. 60W, convert 120V AC household voltage to 12V DC safety voltage, providing a safer and more practical electrical current level.
【Countdown Timer & Memory Function】: Press the select button to set 2/4/6/8 hour countdown easily, so it will turn on at dusk and automatically turn off 2/4/6/8 hours later. Memory function, the transformer remains the timer mode you selected before, even when power outage.
【Easy Installation & Weatherproof】: Built-in hanging hole, 3.3ft power cable, mount it on outdoor walls directly. Molded weatherproof body, protects the transformer from rain, snow, dust and abrasion, withstands years of use.SKU: n/a -
Blowers and vacuums, Cleanup & cleaning, FALL Sale & Deals, GARDEN EQUIPMENT
Husqvarna 125BVx 28cc 2-Cycle Gas Powered 170 MPH Blower/Vac With Smart Start
-25% Blowers and vacuums, Cleanup & cleaning, FALL Sale & Deals, GARDEN EQUIPMENT
Husqvarna 125BVx 28cc 2-Cycle Gas Powered 170 MPH Blower/Vac With Smart Start
Powerful clearing performance featuring 470 cfm air volume and 170 mph air velocity
Mulching capable when using VAC capability, mulching knives reduce material and increase bag capacity
The Smart start engine and starter have been designed so the machine starts quickly with minimum effortSKU: n/a -
Blowers and vacuums, Cleanup & cleaning, FALL Sale & Deals, GARDEN EQUIPMENT
Makita BHX2500CA Commercial Grade 4-Stroke 24.5cc Handheld Blower, CARB Compliant
-12% Blowers and vacuums, Cleanup & cleaning, FALL Sale & Deals, GARDEN EQUIPMENT
Makita BHX2500CA Commercial Grade 4-Stroke 24.5cc Handheld Blower, CARB Compliant
Fuel efficient 4-stroke engine – up to 60-Percent fuel cost savings
Quick start – low compression engine for easy starting
Lightweight (9.8-Pounds) For easy maneuverabilitySKU: n/a -
Composting
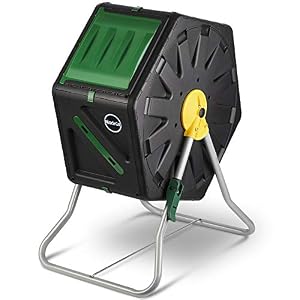
Miracle-Gro Small Composter – Compact Single Chamber Outdoor Garden Compost Bin – Heavy Duty 18.5gal (70L) Capacity…
 Composting
Miracle-Gro Small Composter – Compact Single Chamber Outdoor Garden Compost Bin – Heavy Duty 18.5gal (70L) Capacity…
✔ FEED YOUR PLANTS AND WATCH THEM GROW – Discover the gardening secret all green thumbs swear by! Compost adds vital nutrients back into the soil to make your fruits, vegetables, and flowers flourish like never before. And with Miracle-Gro’s large capacity compost tumbler, you’ll be sure to have a steady supply of compost to keep your garden thriving.
✔ COMPACT YET MIGHTY – Get the best of both worlds with Miracle-Gro’s large outdoor compost bin! It’s small enough for tight spaces, while offering an impressive volume (27.7gal/105L) to fertilize your garden all season long. This rolling compost container easily fits your balcony, porch, patio, or rooftop garden, so you can compost from anywhere!
✔ PROTECT THE PLANET AND BOOST YOUR GARDEN – Don’t let your valuable kitchen and garden scraps end up in a landfill! Instead, transform them into rich, fertile compost with Miracle-Gro’s barrel garden composter. The unique aeration system speeds up decomposition, creating usable compost in just 4-6 weeks. Waste less and cook up some compost that your plants will love!SKU: n/a
-
FALL Sale & Deals, GARDEN EQUIPMENT, Garden wear
6 Pairs Garden Gloves for Women, Nitrile Coated Working Gloves, for Gardening, Restoration Work, Pink & Green, M
-8%FALL Sale & Deals, GARDEN EQUIPMENT, Garden wear6 Pairs Garden Gloves for Women, Nitrile Coated Working Gloves, for Gardening, Restoration Work, Pink & Green, M
Designed for Women: This HAUSHOF 6 pairs garden gloves are made exclusively for women or smaller hands. Wearing these working gloves to look after your hands, which making handling tiny seeds, delicate seedling and other light tasks much more easy. The simple design will make palms open and close easily, effortless to reach tools and planting.
Nitrile Coated: The nitrile coating on the palm staves off the bite and sting of insects commonly found in and around vegetation.
Wrist Closure for Protect: Elastic closures keep more of a snug fit of the glove. The wrist closure of HAUSHOF garden gloves prevent loose materials from falling into glove opening when you are digging or weeding. Knitted base that has an extended fitted cuff for added protection, and also keeps moisture from both plants and soil from soaking into the material.SKU: n/a -
Composting, FALL Sale & Deals, GARDEN ACCESSORIES
Garnen 72 Gallon Garden Waste Bags (2 Pack), Heavy Duty Reusable/Collapsible Leaf Basket Bags with 4 Reinforced Handles for Lawn Yard Pool Plant Trash Trimming Gardening Containers
-14%Composting, FALL Sale & Deals, GARDEN ACCESSORIESGarnen 72 Gallon Garden Waste Bags (2 Pack), Heavy Duty Reusable/Collapsible Leaf Basket Bags with 4 Reinforced Handles for Lawn Yard Pool Plant Trash Trimming Gardening Containers
[72 GALLON WASTE BAGS] Garnen’s yard waste bags are one of the best gardening tools for anyone with a green thumb. Their 72 gallon capacity is large and suitable for both compact and bulky yard waste, like branches, vines, weeds, grass-clippings, etc. They hold more waste than other bags, so you don’t need to take as many trips to empty them.
[ERGONOMIC DESIGN] The outdoor collapsible bags keep ergonomics and convenience in mind. The bags are able to stay upright and open without additional support. Two handles at the top and two at the bottom make the bags easy to carry and empty.
[DURABLE BAGS WITH REINFORCED HANDLES] The polypropylene woven trash bags are lightweight, durable, water-repellent, tear-resistant, and eco-friendly. The nylon handles are reinforced with double stitched webbing, making them extra sturdy.SKU: n/a -
Composting, FALL Sale & Deals, GARDEN ACCESSORIES
3Pack 72Gallons Collapsible Garden Waste Bags, Self-Standing and Reusable Leaf Bag
Composting, FALL Sale & Deals, GARDEN ACCESSORIES3Pack 72Gallons Collapsible Garden Waste Bags, Self-Standing and Reusable Leaf Bag
High capacity: The capacity of each garden bag is 72 gallons (H: 76, D: 67), you will have enough space to collect leaves, green cuttings, lawn, hedge cutting, small branches, shrubs, bushes and other wastes. They are very practical containers for garden waste.
Thick and durable: The bag is made of polypropylene fabric, it’s tear-resistant and heat-resistant, not easy to deform, very thick and waterproof.
Easy to use: Each bag has 4 grab handles (2 at the top, 2 at the bottom) and a plastic strips (the bag mouth has a special holes for inserting plastic tape to fix the bag mouth) make the transportation and emptying easier.SKU: n/a -
FALL Sale & Deals, GARDENING TOOLS, Rakes
Garden Rake -Small Leaves Rakes for Gardening – 11 Metal Tines 8.5″ Wide – 78″ Long Handle Leaf Rakes for Lawns Heavy Duty for Yard Lawn Shrub Garden Beds
-7%FALL Sale & Deals, GARDENING TOOLS, RakesGarden Rake -Small Leaves Rakes for Gardening – 11 Metal Tines 8.5″ Wide – 78″ Long Handle Leaf Rakes for Lawns Heavy Duty for Yard Lawn Shrub Garden Beds
Premium stainless steel thickened pipe made, this leaf rakes is solid & durable for lifetime use
36-78” adjustable long handle for better accommodate your height and reach.
With 8.5” wide head,this garden rake is great for getting leaves between garden flower bed & shrubsSKU: n/a -
Feeds & fertilizers, FOR PLANTS
Mono Potassium Phosphate for Plants 0-52-34, Soluble Fertilizer for Gardening and Hydroponic Use (2 LB)
-6%Feeds & fertilizers, FOR PLANTSMono Potassium Phosphate for Plants 0-52-34, Soluble Fertilizer for Gardening and Hydroponic Use (2 LB)
Monopotassium Phosphate fertilizer contains 52% Phosphorous and 34% Potassium and is water soluble.
Soluble Fertilizer for Fertigation and Foliar Spray
For Use in Gardens, Hydroponic, and GreenhouseSKU: n/a -
Blowers and vacuums, GARDEN EQUIPMENT
Greenworks 24V Cordless Jet Blower, 2.0 AH Battery Included
Finish your project with up to 11 minutes of runtime on high with a 2Ah battery
Powerful axial design provides 330 CFM at 100 MPH
Reduce fatigue with comfort over mold grip and variable speed trigger. Weighs onlySKU: n/a -
Blowers and vacuums, GARDEN EQUIPMENT
EGO Power+ LB6150 615 CFM Variable-Speed 56-Volt Lithium-ion Cordless Leaf Blower – Battery and Charger Not Included…
Blowers and vacuums, GARDEN EQUIPMENTEGO Power+ LB6150 615 CFM Variable-Speed 56-Volt Lithium-ion Cordless Leaf Blower – Battery and Charger Not Included…
Turbo button delivers 615 CFM, up to 170 MPH with tapered nozzle attached
Up to 75 minutes of average runtime on a single charge with the recommended 56V 2.5Ah ARC Lithium battery (available separately)
Variable speed dial from 200 CFM to 480 CFM with lock on button for ultimate controlSKU: n/a -
FALL Sale & Deals, GARDENING TOOLS, Rakes
Jardineer 73 inch Garden Rake Leaf, Adjustable Lawn Rake for Leaves, Yard Rakes for Lawns with Expandable Head. Ideal…
-7%FALL Sale & Deals, GARDENING TOOLS, RakesJardineer 73 inch Garden Rake Leaf, Adjustable Lawn Rake for Leaves, Yard Rakes for Lawns with Expandable Head. Ideal…
73” LESS BENDING & 30” BIGGER EFFICIENT HEAD: 73” longer leaf rake allows less bending down and less fatigue during long time work. The 30” larger rake head is designed to collect more debris with each pass efficiently. Adjust leaf rake head at any width easily in seconds by turning the yellow lock anytime.
THICKER TINES FOR STABLER & STRONGER :18 steel tines are made thicker to bear more debris strongly and stably, collect leaves more efficiently.1” Aluminum handle material is in nature unbendable compared to normal steel rake handle. Top-class Metal construction is made to last for years
LIGHTWEIGHT & MULTI-USE: This ideal rake easily rakes up clippings, leaves and loose lawn and garden debris without damaging plants. Adjust leaf rake width to 10″ for tight areas like under hedges or between flower beds without concern. Note that the leaf rake is NOT designed for heavy duty use such as rock or heavy materials.SKU: n/a

Tips & Inspirations
Eliminate Ants and Cockroaches with This Effective Toothpaste Hack
Discover how to permanently eliminate ants and cockroaches from your home with a simple DIY toothpaste hack. Learn to prepare and apply this effective, non-toxic remedy with our step-by-step guide.

The Wonder of WD-40: A Must-Have in Every Home
Discover the Magic of WD-40: The Ultimate Household Hero Unlock the secret world of WD-40 and its endless uses that extend beyond just squeaky hinges. From cleaning to crafting, learn how this iconic product can revolutionize the way you maintain your home, vehicle, and garden.

🦟🚫 Say Goodbye to Mosquito Bites! 🚫🦟
Discover the ultimate protection against mosquitoes with our Ultrasonic Mosquito Repeller Bracelet. Enjoy up to 150 hours of safe, chemical-free repellent with stylish, USB-chargeable designs. Perfect for outdoor enthusiasts. Say goodbye to bites now!

Exploring Boxwood Alternatives for Your Garden: Vibrant and Resilient Choices
Beyond Boxwoods: Vibrant Alternatives for Your Blight-Free Garden Discover vibrant and resilient boxwood alternatives to rejuvenate your garden without the fear of blight. Explore our top picks, from Inkberry Holly to reblooming Azaleas, for a lush, disease-resistant landscape.

Safeguarding Your Garden: The Ultimate Guide to Boxwood Moth Treatment
Discover how to protect your boxwoods from the invasive boxwood moth in Toronto. Learn the signs of infestation, why boxwoods are vulnerable, and effective treatment options, including professional recommendations.
5 Must-Have Gardening Tools for Canadian Springs: A Beginner’s Guide
Top 5 Essential Gardening Tools for Canadian Springs: A Beginner’s Guide Kickstart your spring gardening in Canada with our guide to the top 5 essential gardening tools. From ergonomic trowels to durable garden forks, find out what you need and our top product recommendations.

The Ultimate Spring Gardening Checklist for South Ontario Gardeners: A Comprehensive Guide
Ultimate Spring Gardening Checklist for South Ontario: Tips & Tools Prepare your South Ontario garden for spring with our comprehensive checklist. Discover essential steps, from soil preparation to planting, and get product recommendations for a thriving garden.

Shielding the Sun’s Allies: A Beginner’s Guide to Preventing Solar Panel Damages
Discover essential tips and product recommendations for preventing damage to your solar panels. Learn how to clean, protect, and maintain your solar energy system for optimal performance and longevity.